Log into switch and go to Auto Attendant. If new menu needs to be made then you will need to select new at the top and a window will pop up here is where you can name the menu.

Once you have created the new menu double click on it and a window will populate. You will need to make a prompt number unless one is already provided in the space. (Prompt number is what allows the customer to record a message and it be attached to that specific menu) If they want the customers to be able to search for extensions then make sure the box next to Search For Mailboxes & Extensions is checked but if they don’t then uncheck the box. Under the Max input try’s this allows us to set how many times a customer is allowed to try to select the options or repeat the message up to X amount of times.

Under the Caller Input is where you will set the options up for this menu. Click the ADD and when the window pops up where it says Input you want to put what number will be pressed. When the number is set go to the Action here you will select between Dial, Mailbox, Menu, Dir or Goodbye. * Dial when selected, means they will push X number (the number you set in Input) it will go to? Under Extension there is a drop down window and here you can select ring group, general mailbox, menu’s/AA, extensions, if they have virtual extensions you can select one or virtual remote message check. Under Extension it says Extension Number To Play To Caller, here is where you will want to set the extension (by default the extension should already be displayed in the box once one is selected), Now if they don’t want it to be read out then you need to remove the number from the box as well as checking the box next to Quite Transfer. If they want to have hold music play during the transfer then check the box next to Play MOH To Caller. If you do check the box for Play MOH To Caller then below that another drop down menu will be next to MOH Zone. Here is where you will select from which zone the MOH will come from. (Most companies will have just one MOH Zone and when they have more you need to verify which MOH they are wanting)

* Mailbox when selected, the window will change and underneath the Action will be Mailbox Number. Here you can choose between general mailboxes and personal mailboxes. * Menu when selected a drop down next to menu will appear and once you click on the drop down window you can select which menu you want it to go to.

* Dir when selecting this one you need to be sure with the customer do they want a directory with just first names, last names or both. If they want just the first names or last names then under Input is Directory and next to it is a drop down window where you select first names, last names. Now if the customer wants both the option for first names and last names this is what you will need to do:

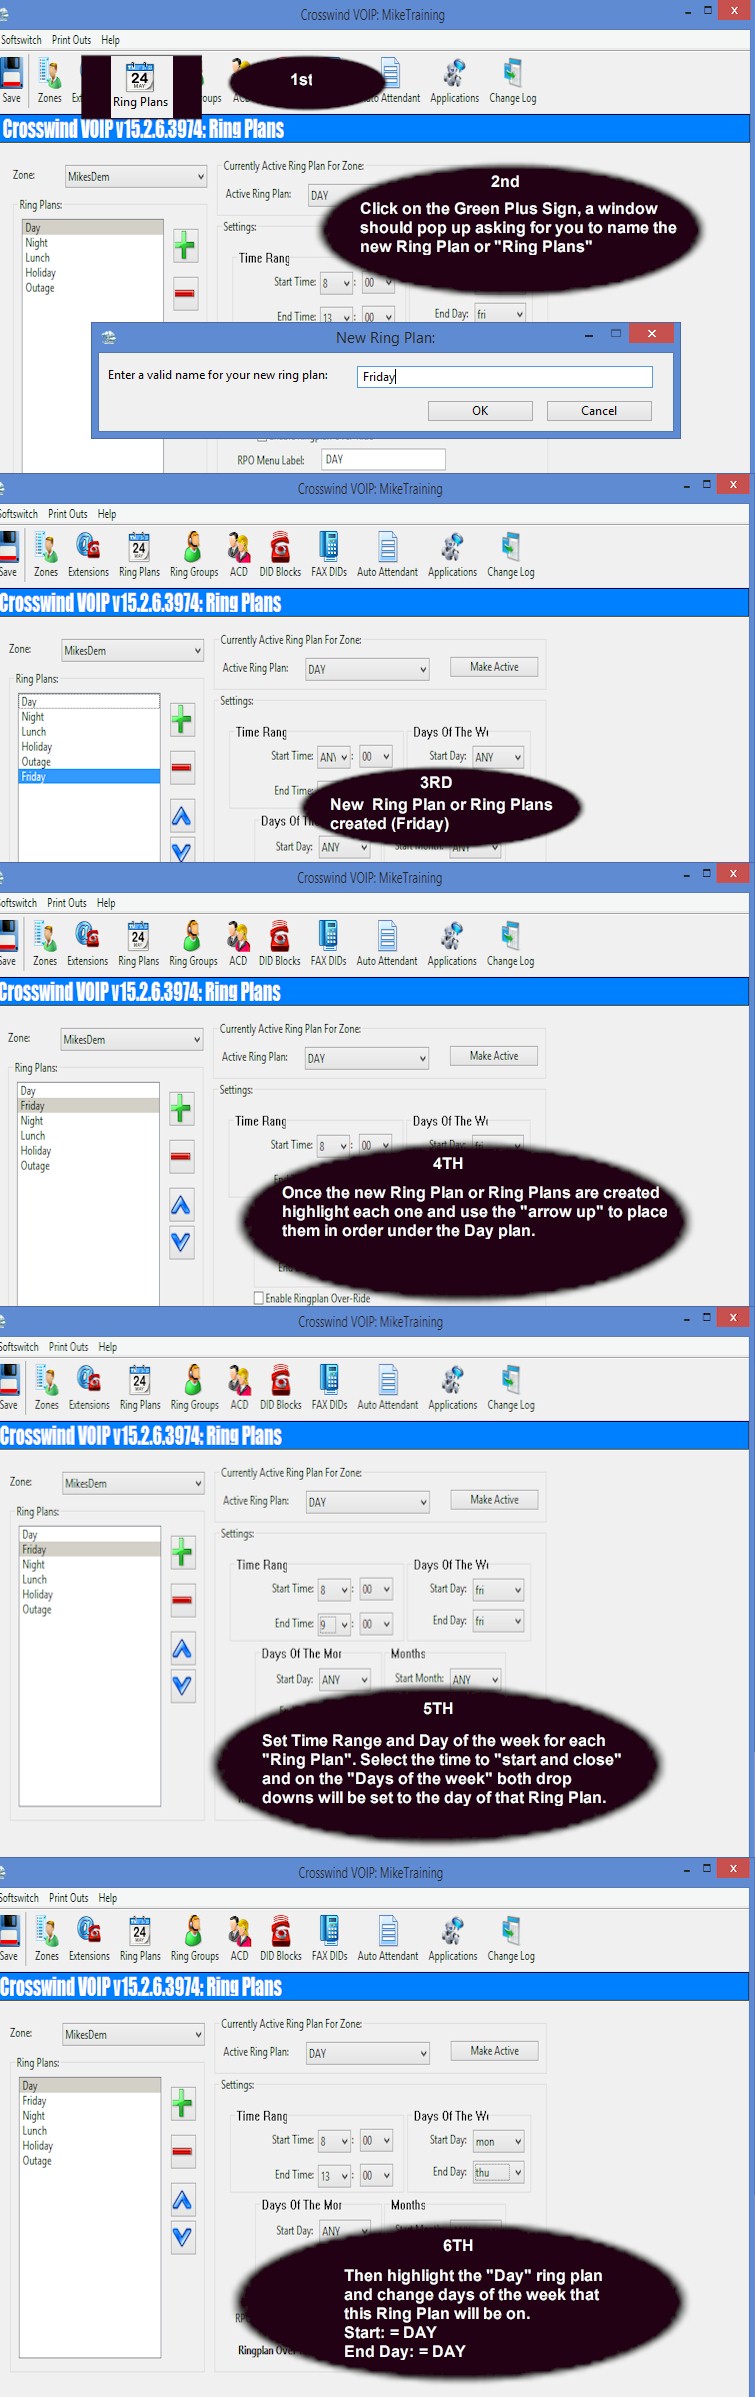
You will need to create another AA menu so you will go to the Auto Attendant and create a new menu. You will name it Directory and you will select add and make 1 go to first names and 2 go to last names then you will go back to previous menu and under whatever number they want their customers to dial you will make that a menu. Then once the window has changed you will select from the drop down window next to menu you will select the menu you created called directory. Now they will need the menu prompts for both the auto attendant/Day menu and Directory and any other menu they are using so they can record the messages.

* Goodbye when selected means no matter what number or option it is the call will be disconnected.

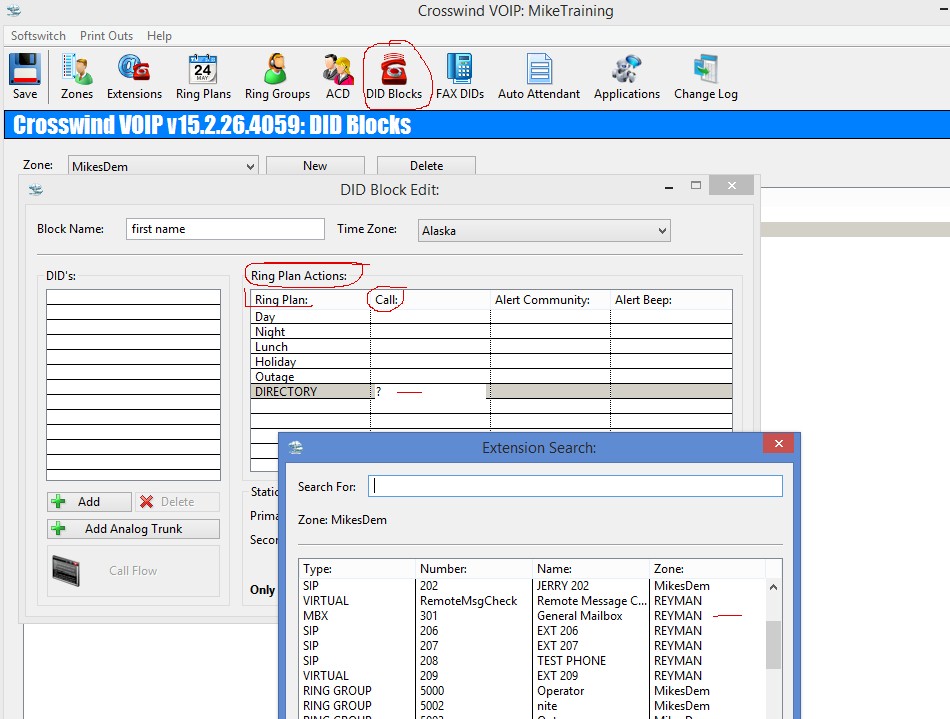
When you are done making the changes to the Menu’s you will need to go to DID Block, double click on the Main of the DID Block and another window should pop up. When the window comes up under the area that says Ring Plan Actions you will see Ring Plan and right next to it Call. Highlight the Call next to whichever Ring Plan you need to set it to and right click in that space, delete what is in space and type a question mark (?) another window will appear and you want to scroll down until you see the menu that the number needs to go to when called.

Save and make sure to notate the ticket number and what you did.
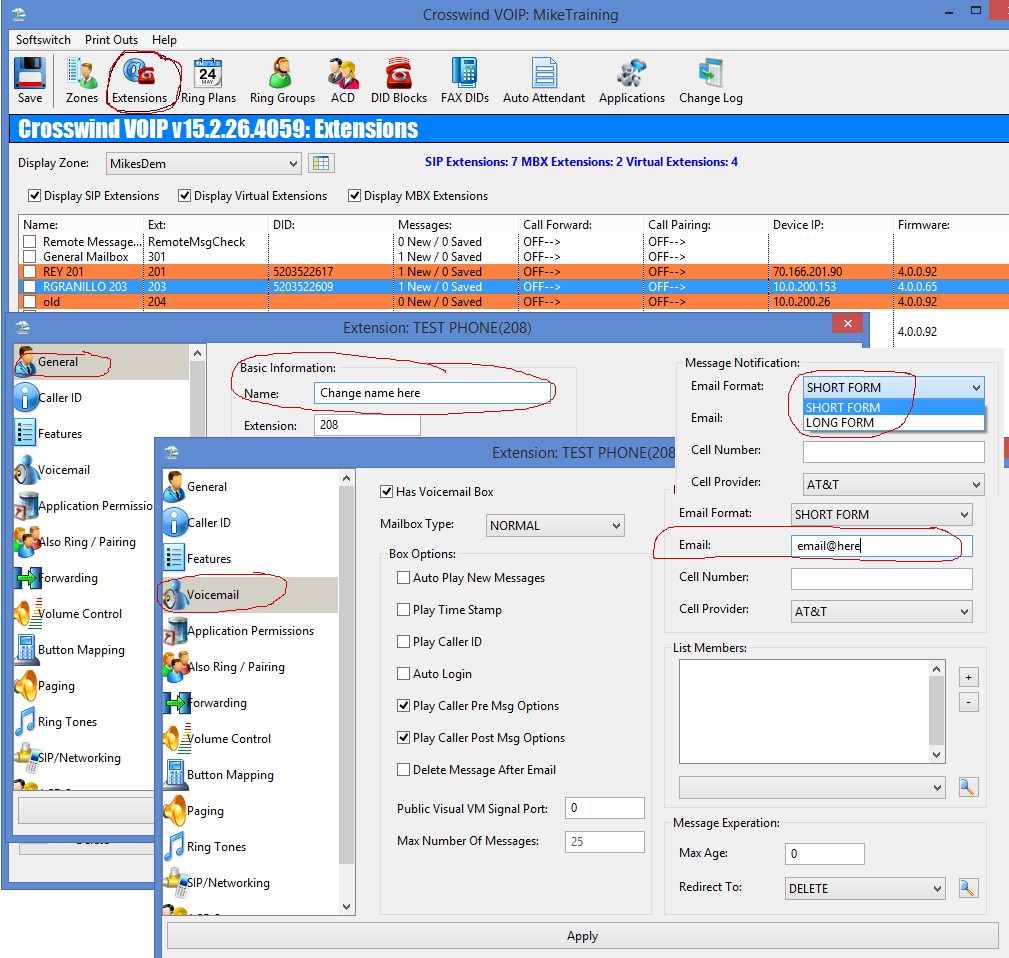
For in-depth over view of extension